Managing invoice and delivery addresses
Creating/changing addresses
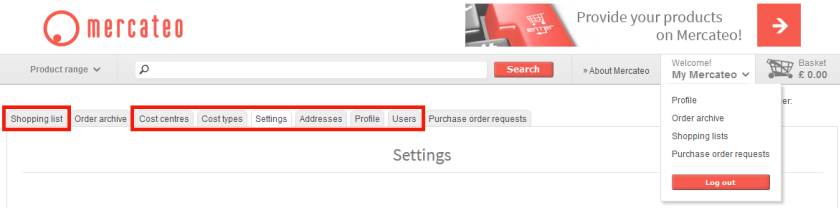
If you are the administrator of the account or if you have the authorization, you can create and change addresses. To add a new address, log on to ‘My Mercateo’, then go to the tab ‘addresses’ and click on ‘new address’.
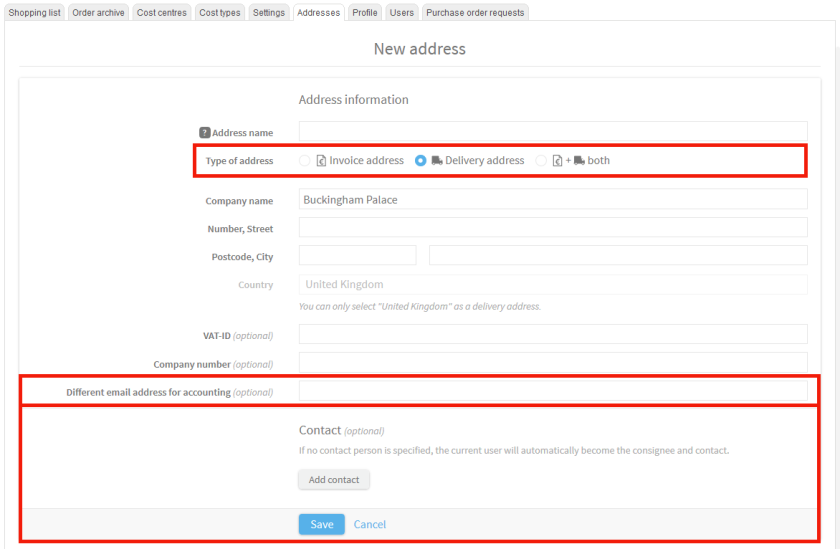
To change an existing address, just click on the three blue dots to edit. If your billing address differs from your delivery address, enter two different addresses and specify this in ‘type of address’ as billing or shipping address.
Please check your address carefully and save your changes.
Different address for invoices
If you have a central email address for receiving invoices (e.g. your accounting department), enter this email address under ‘different email address for accounting’. If you leave this blank, invoices and payment reminders will be sent to the user/buyer. For each address a different email address can be entered for invoices.
Specify contact person
You can specify a contact person with each address. If no contact person is specified, the current user is automatically used as a contact for their order.
Addresses assigned to users
Go to the tab ‘addresses’ and click on the three blue dots next to the corresponding address. Now select ‘assign’ and define which users may use the address.
Managing cost centers and cost types
Add cost centers/types
Log on to ‘My Mercateo’ and go to the tab ‘cost centres’ to add, delete or assign them to specific users. To add a larger amount of cost centers/types, just upload them via a text (.txt) or excel (.xls) file. You can add one account per line and use up to 50 characters per line.
Assign users to cost centers/types
Click on the three blue dots next to the relevant cost center/type and choose ‘assign’. You can now select which user may use this cost center/type.
Set cost centers/types as mandatory
Log on to ‘My Mercateo’ and go to the tab ‘settings’. Tick the box ‘cost centres are mandatory with each order’ and/or ‘cost types are mandatory with each order’ and click save.
Managing purchase order numbers
Mandatory purchase order numbers
If all purchase order numbers are required to be set for all orders and users, log on to ‘My Mercateo’ and go to the tab ‘settings’’. Tick the box next to ‘Requesters must state a customer related order number’ and click ‘save’.
Adding purchase order numbers to your order
On the preview page of your order, you can add an internal purchase order number as reference. Just go to ‘optional information’, add your purchase order number and click ‘submit order’. The number you entered can be found in all related communications, on the invoice and in your order archive.
Managing shopping lists
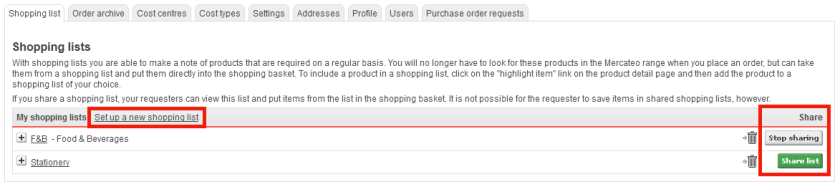
Log on to ‘My Mercateo’ and go to the tab ‘shopping list’. Here you can create new shopping lists, put items from your lists directly into the shopping basket and release existing shopping lists to all users of your purchasing hierarchy.
Managing users and purchasing hierarchy
Log on to ‘My Mercateo’ and go to the tab ‘users’ to see all users listed in your hierarchy.
Add/create purchasing hierarchy
Click on ‘new employee’. On the next page click ‘save’. The user receives an email with all the login data and is placed directly beneath you in the purchasing hierarchy. Now drag the user data via drag&drop to the desired position or click on the user name and select a now approver.
Deleting users
Click on the three blue dots next to the user and select ‘delete’. Confirming this choice, the user has no access to your business account anymore. Users who were placed in the purchasing hierarchy where a user has been deleted, are automatically assigned to the next higher user position.
Moving users
Click on ‘hierarchy’ in the top right corner and drag users via drag&drop to the desired position or click on the user name and select a new approver.
Assigning addresses
Click on the three blue dots next to the user and select ‘administrate’ and ‘addresses’. Select the billing and shipping addresses to be assigned to the user. If you want to assign addresses to multiple users, go to the main contacts tab and click again on the three blue dots next to ‘addresses’. Select ‘assign’ and add users.
Assigning cost centers/types
Click on the three blue dots next to the relevant user and select ‘administrate’ and ‘account assignment’. You can now select which user may use this cost center/type. Would you like to assign multiple users to a cost center/type, go to the main tab ‘cost centres’ or ‘cost types’ and click on the three blue dots. Select ‘assign’ and add the employees.
Allocating budget and approval conditions
Click on the three blue dots next to the user and select ‘administrate’ and then ‘approval rules’. You can then define whether an order should always be approved manually or automatically according to a specific budget for each item, order, month, quarter and/or year. If choosing manual approval or if a budget is exceeded, the next higher positioned user receives the order request by email to approve or disapprove.
Giving permission to create addresses, cost centers/types and users
Next to the user click on the three blue dots and click on ‘administrate’ and then ‘rights’. Just tick the relevant permissions for the user to have and click ‘save’.